2.8 Light Alarm Clock
In life, there are various kinds of time alarm clocks. Now let’s make a light-controlled alarm clock. When morning comes, the brightness of light increases and this light-controlled alarm clock will remind you that it’s time to get up.
You Will Learn
Photoresistor working principle
Stopping sound playback and stopping scripts from running
Required Components
In this project, we need the following components.
It’s definitely convenient to buy a whole kit, here’s the link:
Name |
ITEMS IN THIS KIT |
LINK |
|---|---|---|
3 in 1 Starter Kit |
380+ |
You can also buy them separately from the links below.
COMPONENT INTRODUCTION |
PURCHASE LINK |
|---|---|
Build the Circuit
A photoresistor or photocell is a light-controlled variable resistor. The resistance of a photoresistor decreases with increasing incident light intensity.
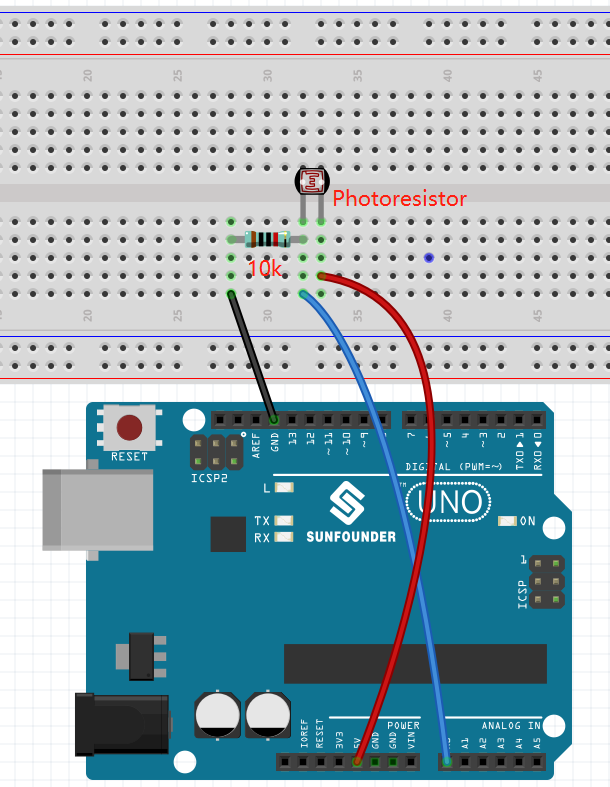
Build the circuit according to the following diagram.
Connect one end of the photoresistor to 5V, the other end to A0, and connect a 10K resistor in series with GND at this end.
So when the light intensity increases, the resistance of a photoresistor decreases, the voltage division of the 10K resistor increases, and the value obtained by A0 becomes larger.
Programming
1. Select a sprite
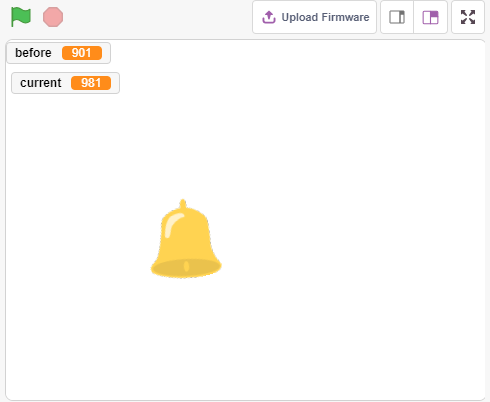
Delete the default sprite, click the Choose a Sprite button in the lower right corner of the sprite area, enter bell in the search box, and then click to add it.
2. Read the value of A0
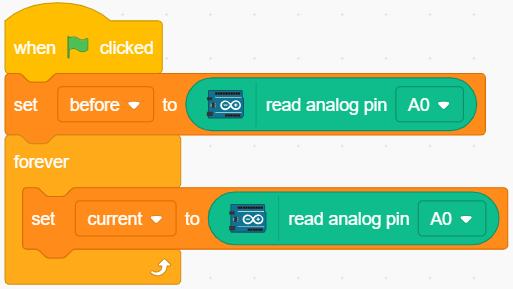
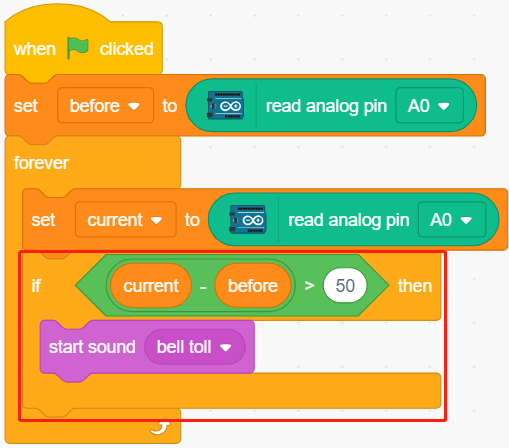
Create two variables before and current. When green flag is clicked, read the value of A0 and store it in variable before as a reference value. In [forever], read the value of A0 again, store it in the variable current.
3. Make a sound
When the value of current A0 is greater than the previous 50, which represents the current light intensity is greater than the threshold, then let the sprite make a sound.
4. Turning the sprite
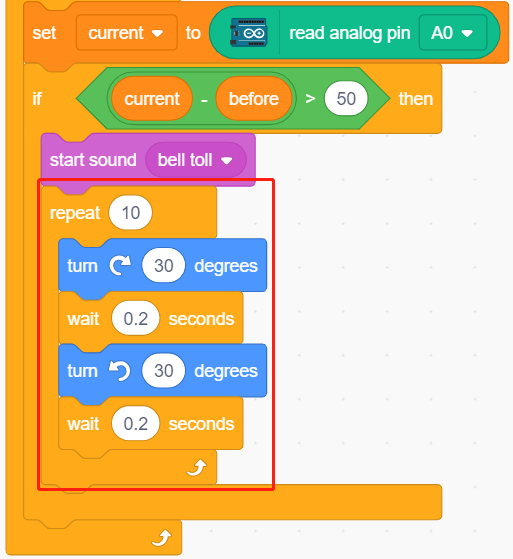
Use [turn block] to make the bell sprite turn left and right to achieve the alarm effect.
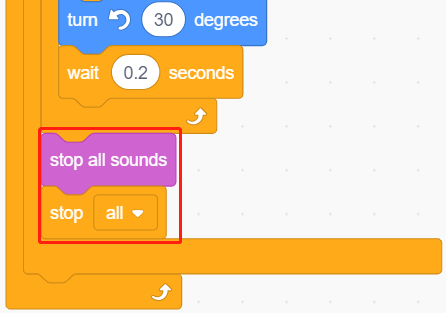
5. stop all
Stops the alarm when it has been ringing for a while.
