2.10 Pendulum
In this project, we will make an arrow pendulum while the servo will follow the rotation.
You Will Learn
How the servo works and the angle range
Draw a sprite and put the center point on the tail.
Required Components
In this project, we need the following components.
It’s definitely convenient to buy a whole kit, here’s the link:
Name |
ITEMS IN THIS KIT |
LINK |
|---|---|---|
3 in 1 Starter Kit |
380+ |
You can also buy them separately from the links below.
COMPONENT INTRODUCTION |
PURCHASE LINK |
|---|---|
Build the Circuit
A servo is a geared motor that can only rotate 180 degrees. It is controlled by sending electrical pulses from your circuit board. These pulses tell the servo what position it should move to.
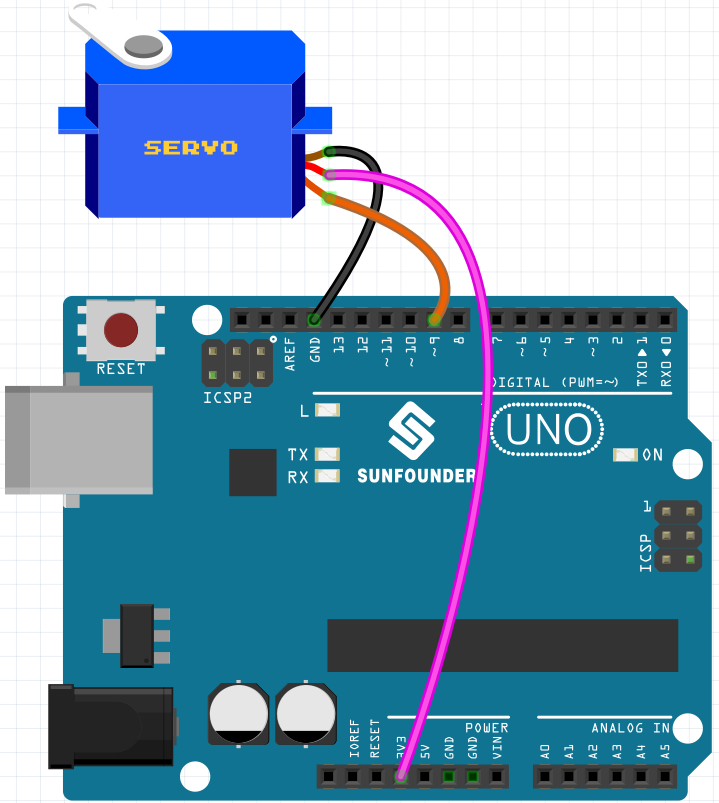
The servo has three wires: the brown wire is GND, the red one is VCC (connect to 3.3V), and the orange one is the signal wire. The angle range is 0-180.
Now build the circuit according to the diagram below.
Programming
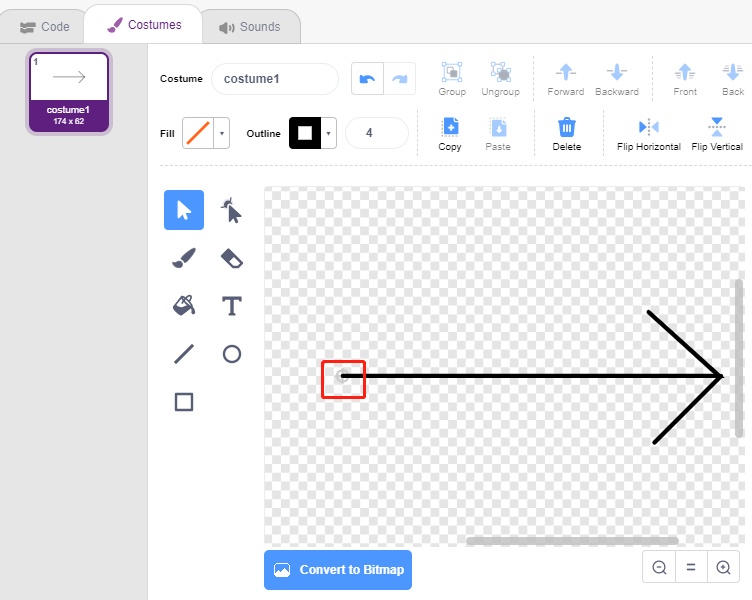
1. Paint a sprite
Delete the default sprite, select the Sprite button and click Paint, a blank sprite Sprite1 will appear.
On the open Costumes page, use the Line tool to draw an arrow.
Note
Be sure to start drawing the arrow from the center of the canvas outward so that the arrow is turning in a circle with the center point as the origin.
Hold Shift to make the line angle straight or 45 degrees.
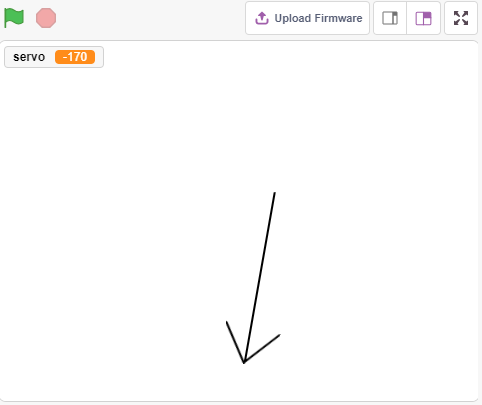
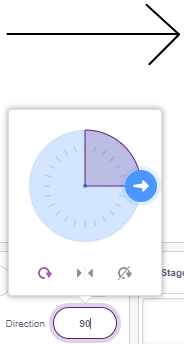
After drawing, the arrow sprite will be displayed on the stage, name it arrow. Then click on the number after Direction, a circular dial will appear, now drag this arrow and see if the arrow sprite on the stage turns with the tail as the origin.
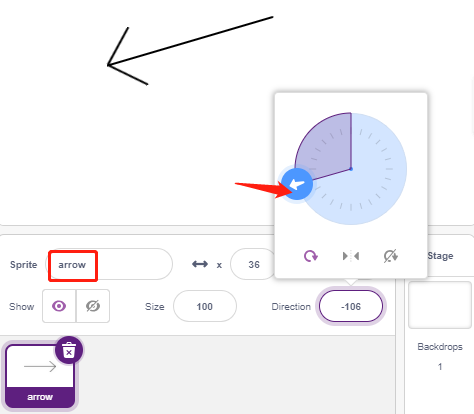
To make the arrow sprite swing from the left to the right, the angle range is -90 to -180, 180 to 90.

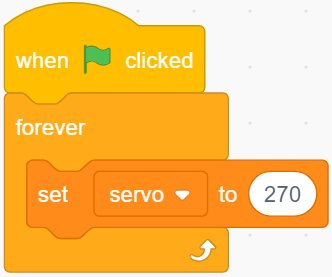
2. Creating a variable.
Create a variable called servo, which stores the angle value and sets the initial value to 270.
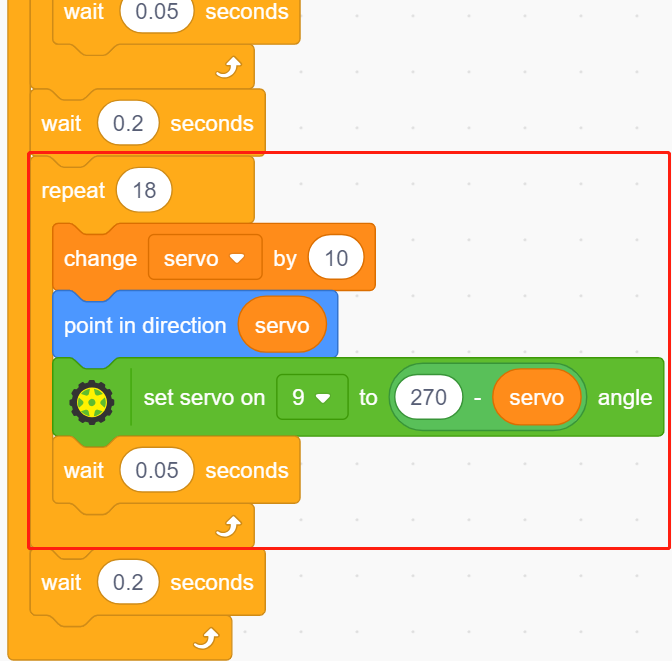
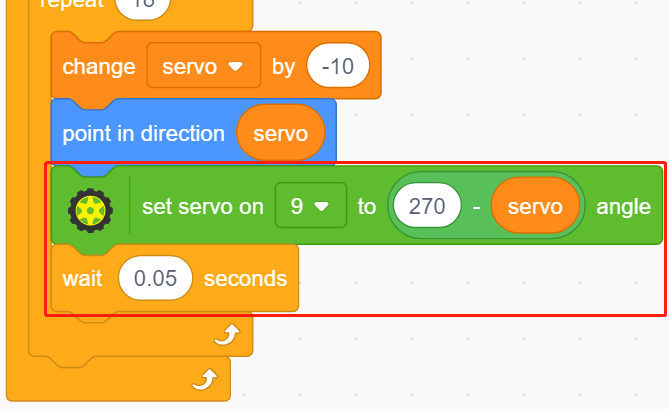
3. Swing from the left to the right
Now let the arrow sprite swing from the left -90 degree position to the right 90 degree position.
With [repeat] block, add -10 to the variable each time, and you’ll get to 90 degrees in 18 passes. Then use [point in block] to make the arrow sprite turn to these angles.
Since the sprite rotation angle is -180 ~ 180, angles outside this range are converted by the following conditions.
If angle > 180, then angle -360.

4. Turning the Servo
When you click on the green flag, you will see the arrow quickly turn to the right and then back to the left, so use a [wait seconds] block here to make the rotation slower. Also use the [set servo on to angle] block to make the servo connected to the Arduino board turn to a specific angle.
5. Swinging from right to left
By the same method, make the servo and arrow sprite slowly rotate from the right to the left.
If angle > 180, then angle -360.