6. Play with Ultrasonic Module
In 5. Play with Obstacle Avoidance Module project, the 2 infrared obstacle avoidance modules are used for obstacle avoidance, but the detection distance of IR obstacle avoidance module is short, which may make the car too late to avoid the obstacles.
In this project, we use ultrasonic module to do some long-distance detection, so that the car can sense obstacles at a farther distance to make a judgment.
Required Components
In this project, we need the following components.
It’s definitely convenient to buy a whole kit, here’s the link:
Name |
ITEMS IN THIS KIT |
LINK |
|---|---|---|
3 in 1 Starter Kit |
380+ |
You can also buy them separately from the links below.
COMPONENT INTRODUCTION |
PURCHASE LINK |
|---|---|
- |
|
Wiring
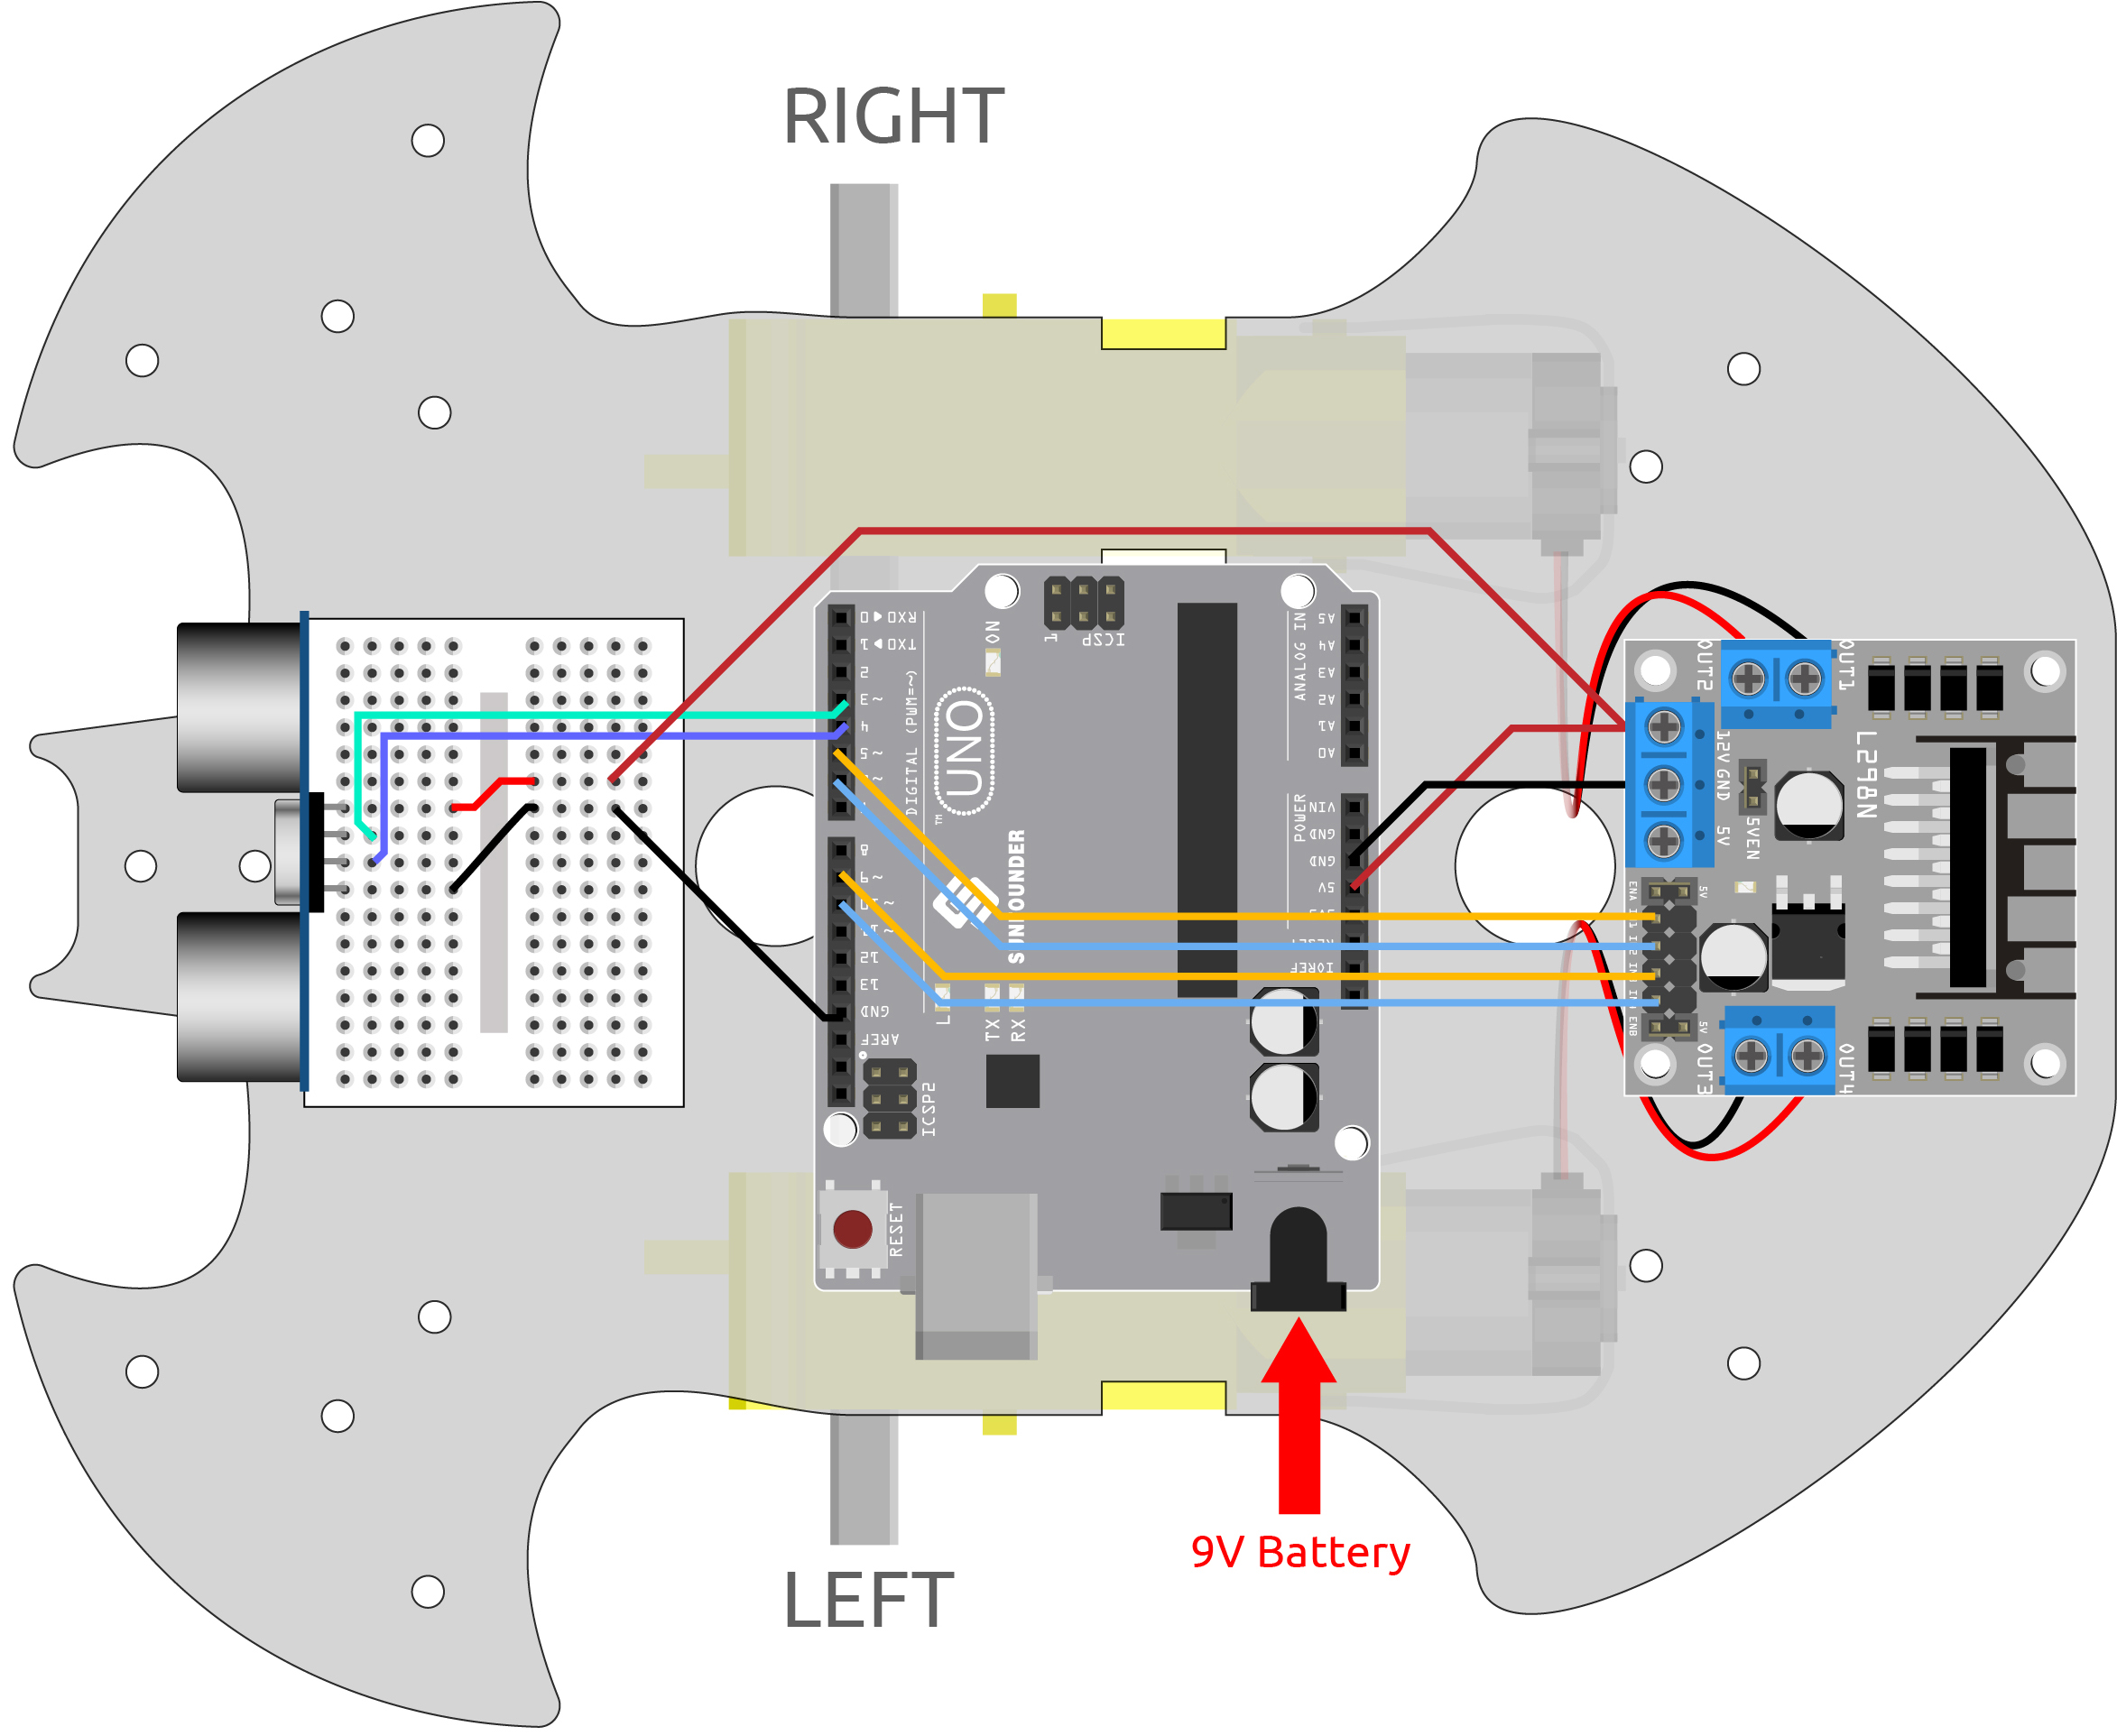
An ultrasonic sensor module is an instrument that measures the distance to an object using ultrasonic sound waves. It has two probes. One is to send ultrasonic waves and the other is to receive the waves and transform the time of sending and receiving into a distance, thus detecting the distance between the device and an obstacle.
Now build the circuit according to the following diagram.
Ultrasonic Module |
R3 Board |
|---|---|
Vcc |
5V |
Trig |
3 |
Echo |
4 |
Gnd |
GND |
Code
Note
Open the
6.ultrasonic_module.inofile under the path of3in1-kit\car_project\6.ultrasonic_module.Or copy this code into Arduino IDE.
Or upload the code through the Arduino Web Editor.
After the code is successfully uploaded, turn the car towards the wall. If the distance is too far, it will move forward; if it is too close, it will move backward; if it is at a safe distance, it will stop.
How it works?
This project is based on the distance read by the ultrasonic module to make the car move accordingly.
Add the pin definition for the ultrasonic module,
trigPinis used to transmit ultrasonic wave, so set it toOUTPUT;echoPinis set toINPUTto receive ultrasonic wave.... const int trigPin = 3; const int echoPin = 4; void setup() { ... //ultrasonic pinMode(echoPin, INPUT); pinMode(trigPin, OUTPUT); }
First read the distance value obtained from the ultrasonic module, if the distance is greater than 25, let the car move forward; if the distance is between 2-10cm, let the car move backward, otherwise (between 10~25) stop.
void loop() {
    float distance = readSensorData();
    if (distance > 25) {
        moveForward(200);
    }
    else if (distance < 10 && distance > 2) {
        moveBackward(200);
    } else {
        stopMove();
    }
}
About
readSensorData()function.The transmitter of the ultrasonic module transmits a 10us square wave signal every 2us, and the receiver receives a high level signal if there is an obstacle within the range. Use the
pulseIn()function to record the time from sending to receiving, divide by the speed of sound 340m/s, and then divide by 2, the result is the distance between this module and the obstacle with units: cm.float readSensorData() { digitalWrite(trigPin, LOW); delayMicroseconds(2); digitalWrite(trigPin, HIGH); delayMicroseconds(10); digitalWrite(trigPin, LOW); float distance = pulseIn(echoPin, HIGH) / 58.00; //Equivalent to (340m/s*1us)/2 return distance; }
-
pin: the number of the Arduino pin on which you want to read the pulse. Allowed data types: int.value: type of pulse to read: either HIGH or LOW. Allowed data types: int.
Reads a pulse (either HIGH or LOW) on a pin. For example, if value is HIGH,
pulseIn()waits for the pin to go from LOW to HIGH, starts timing, then waits for the pin to go LOW and stops timing.