3.1 Reading Button Value
In the previous projects, we used the output function, in this chapter we will use the input function to input read the button value.
Required Components
In this project, we need the following components.
It’s definitely convenient to buy a whole kit, here’s the link:
Name |
ITEMS IN THIS KIT |
LINK |
|---|---|---|
3 in 1 Starter Kit |
380+ |
You can also buy them separately from the links below.
COMPONENT INTRODUCTION |
PURCHASE LINK |
|---|---|
Schematic
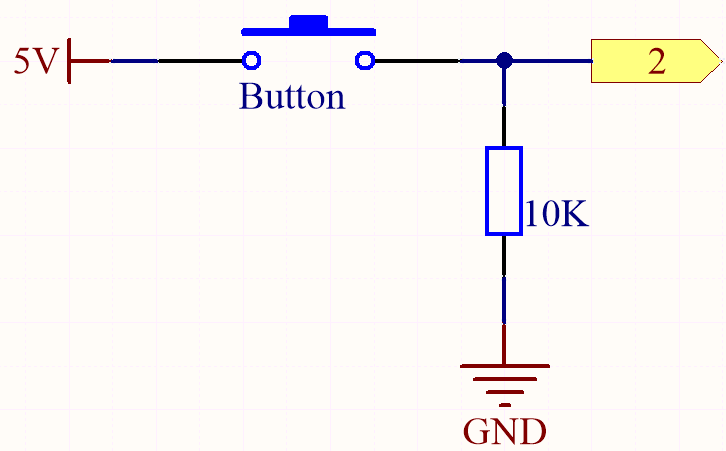
One side of the button pin is connected to 5V, and the other side pin is connected to pin 2, so when the button is pressed, pin 2 will be high. However, when the button is not pressed, pin 2 is in a suspended state and may be high or low. In order to get a stable low level when the button is not pressed, pin 2 needs to be reconnected to GND through a 10K pull-down resistor.
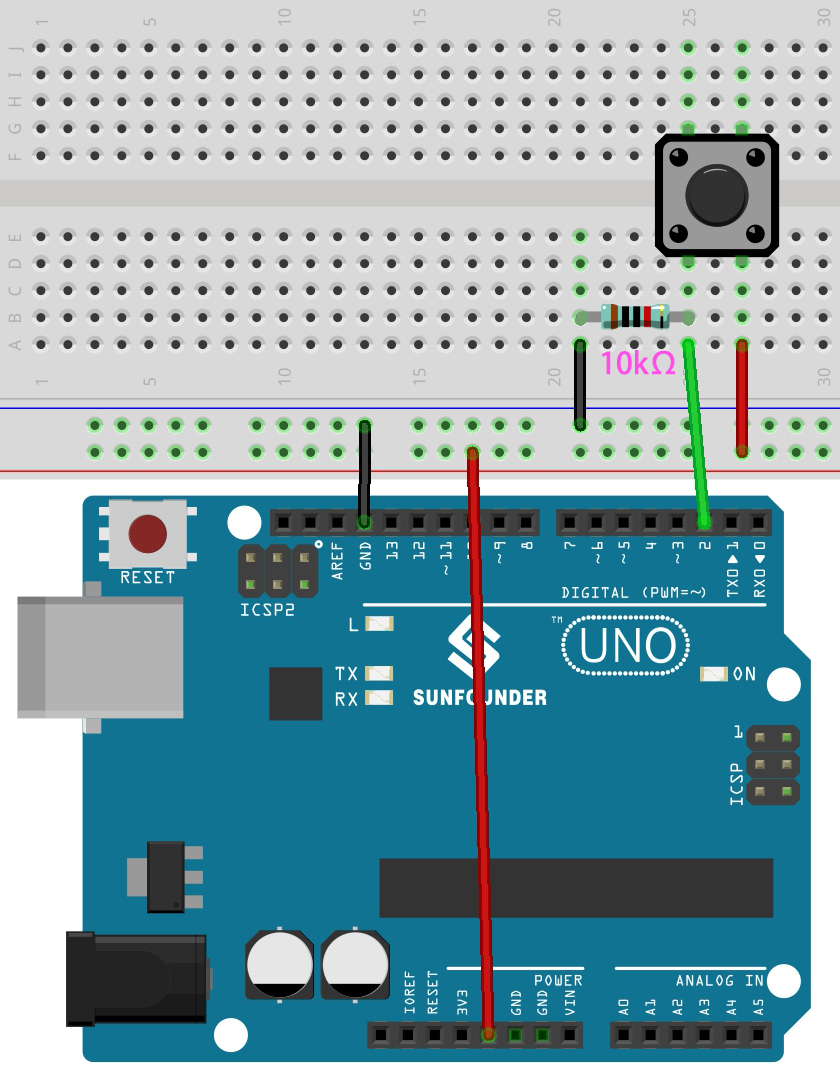
Wiring
Code
Note
You can open the file
3.1.read_button_value.inounder the path of3in1-kit\basic_project\3.1.read_button_value.Or copy this code into Arduino IDE.
Or upload the code through the Arduino Web Editor.
After the code is uploaded successfully, click the magnifying glass icon in the upper right corner of the Arduino IDE (Serial Monitor).

When you press the button, the Serial Monitor will print “1”.